This page is sort of a holding tank for astronomy and microscopy projects and ideas that aren't yet large or involved enough to warrant their own write-ups.
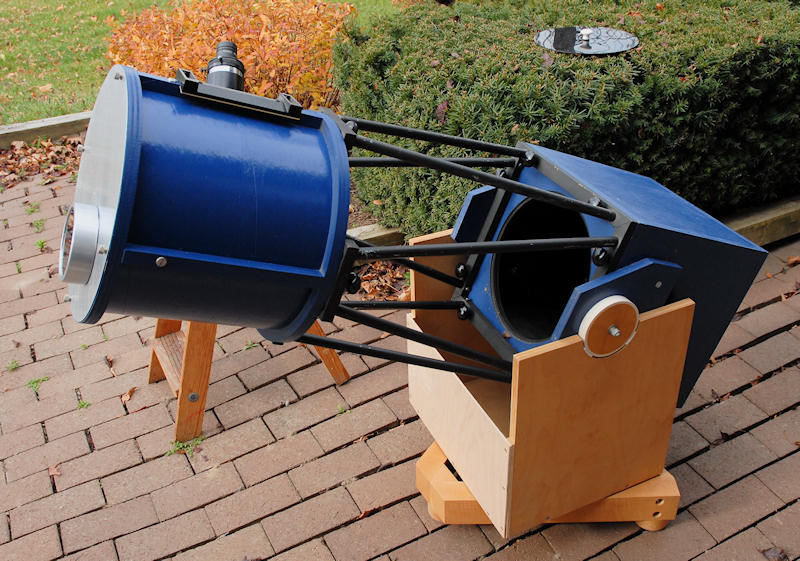
Quite a few years ago I built a 10.1" Dobsonian telescope. Anyone with even rudimentary skills can do this. The lower section of the scope is a plywood box. The upper section is a cardboard tube from a rug. The truss is just short lengths of electrical conduit. The side bearings are short sections of PVC pipe. The mirror came from a now defunct (I think) company, Coulter, and though inexpensive, it took over a year to get it. Another page here describes the secondary mirror holder I made for it.
Lately there's been some interesting solar activity and I thought it would be nice to outfit the scope for solar duty. I had a solar filter from Thousand Oaks that I bought for a small mirror lens. After contacting them about a filter for the 10.1" scope, they said there weren't any advantages to full aperture filters at that size, and I'd get good results with the small one. All I needed to do was adapt it.
My biggest fear using a solar filter is that it might somehow become dislodged. This could result in instant and irreversible blindness due to the intensity of the focused light. Whatever arrangement I made, I wanted it to be absolutely 100% bulletproof.
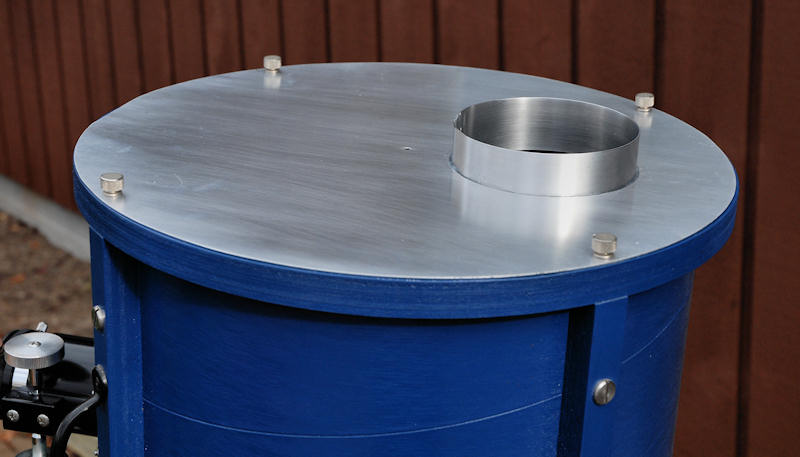
I started by installing 4 #8x32 threaded brass inserts at the top of the telescope to fit some nice #8 thumbscrews that were infesting my junkbox. Next came an aluminum disk for the thumbscrews to hold to the top of the scope. Comparing the weight of aluminum and Sintra, an expanded plastic I often use, the aluminum was lighter. Fabricating the disk was a PITA because it was just a fraction of an inch larger than my bandsaw could accommodate. I cut the blank out with an air powered sheet metal nibbler normally used for auto body work. The circle was then marked out and cut by eye on the non-throat side of the bandsaw. I slipped up and went inside the line briefly, so the disk has a small flat spot. Perfection has always been elusive for me. A circle cutter in the drill press made the off-center aperture.
The solar filter came in an aluminum housing with a felt strip around the inside. This normally held it securely on the lip of the smaller mirror lens it was designed for. I needed to duplicate the lip of the lens. Though something could have been machined on the lathe, it seemed like overkill. I cut an aluminum strip from the same sheet that supplied the disk and bent it into a circle. An overlap joint was made and joined with Aladdin 3-in-1 rod. This is a zinc brazing rod, sometimes looked down upon, but it was perfect for the application.
The original plan was to use the same Aladdin rod to braze the ring into the flat disk. This was abandoned because as soon as the disk was heated it warped severely. It went flat again after cooling, but the risk of permanent warpage seemed too high. Instead, silicon caulk was used to hold the ring.
The back and inside of the ring were sprayed flat black. Telescopes are usually poor daytime imagers because so much stray and reflected light can contaminate the image. This case was particularly bad, since the entire back of the adapter would reflect to the eyepiece. Eyepiece solar filters are not used because the intense heat leads to cracking, but it might make sense to use a less dense main filter and a moderate ND filter at the eyepiece to improve the balance between the wanted solar image, and the unwanted stray light. That would also increase the light available for photography. Maybe someday. At any rate, the new solar filter adapter proved to be a success. The photos are from the early fitting and don't show the flat black paint. I also added thick washers under the adapter to allow warm air to exit.

I suppose this is also what a scope having a chimney and designed to burn wood would look like.

The first tests were successful, though clouds moved in about ten minutes after setting up. It's obvious I need a finder, which should be as simple as a small hole and screen to see the bright spot.
Mounting a dSLR to the telescope or microscope is straightforward. Machine a tube with the right size stub on one end to fit the eyepiece hole, and a M42 x 0.75 thread on the other to fit a T-mount adapter. Job done. Unfortunately, to get serious magnification requires eyepiece projection.
Exactly what eyepiece will perform best for astronomy remains a mystery to me. I started out with a very nice Olympus NFK projection eyepiece used for microscopy. This applies some correction for microscope objectives, but probably isn't ideal for astronomy. I also had it at the wrong distance from the sensor, so it may be better than the first tests indicated. After machining new adapters and testing more lenses I'll continue this page...
Enjoy.