Most frame geometry numbers can be measured and/or calculated using nothing more than a ruler. If you have a tool to measure angles directly, that makes things easier. The one area that's troublesome is fork rake, and the resulting trail measurement from combining that and the head angle. I'm going to suggest an alternative method that's very useful, especially if you're interested in the frame geometry of a bike that isn't available for long enough to make the desired measurements, say in a bike shop or at a race.
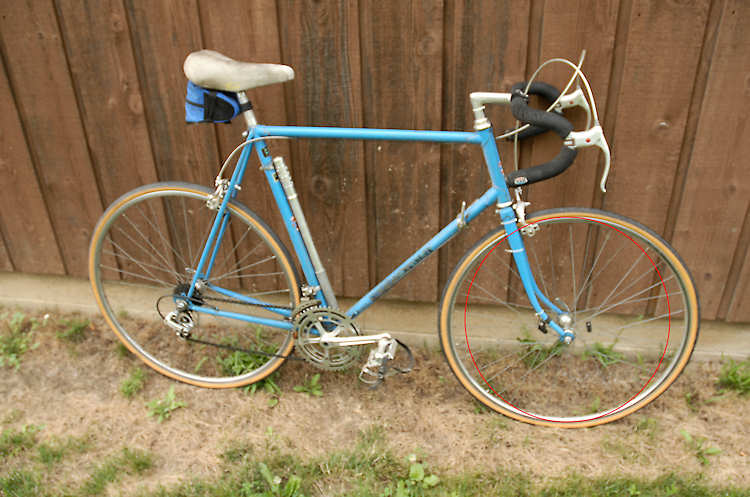
Lots of things are measured photographically and there's no reason you can't do the same with a frame. The caveat is that you need a photo that accurately represents the frame. The typical "glamour" shot of a bike is usually taken close up, giving a perspective that makes accurate measurement difficult or impossible. Many zoom lenses also add some distortion of their own, especially at the wide angle end. As an example, here's a shot of my old rusty Witcomb taken close up, with a red circle drawn on the wheel. Notice how the image of the wheel is anything but round and centered on the axle.

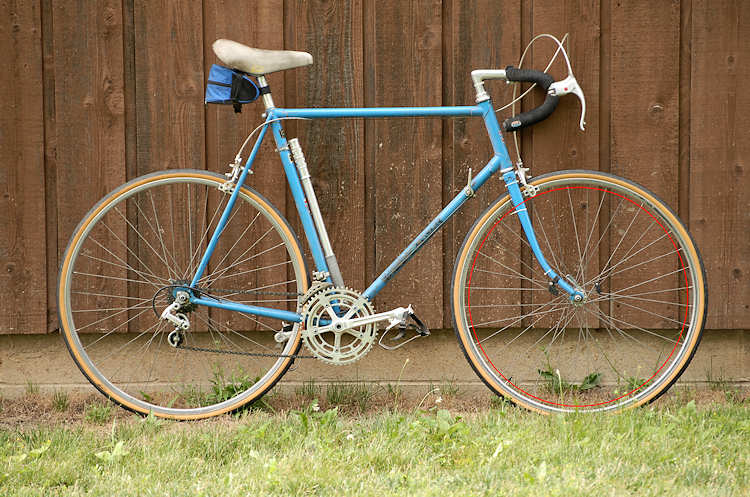
You should be square on to the bike and as far away as possible. Here's a shot taken from further away, using the zoom to keep the image a reasonable size. Notice how the circle better matches the wheel. And though I didn't, there's no law against including a ruler in the shot to make later scaling easier.

Once you have a suitable photo you can go low tech or high tech with the measurement. Low tech involves nothing more than printing the shot on plain paper and using a ruler and protractor to draw lines through the tubes and measure the angles. You'll need one known dimension for scale. This can be any feature measured when you took the photo, or just the standard wheel size. The longer the reference dimension is, the more accurate the results. If you have the time, measure the wheelbase. If not, just use the tire size.
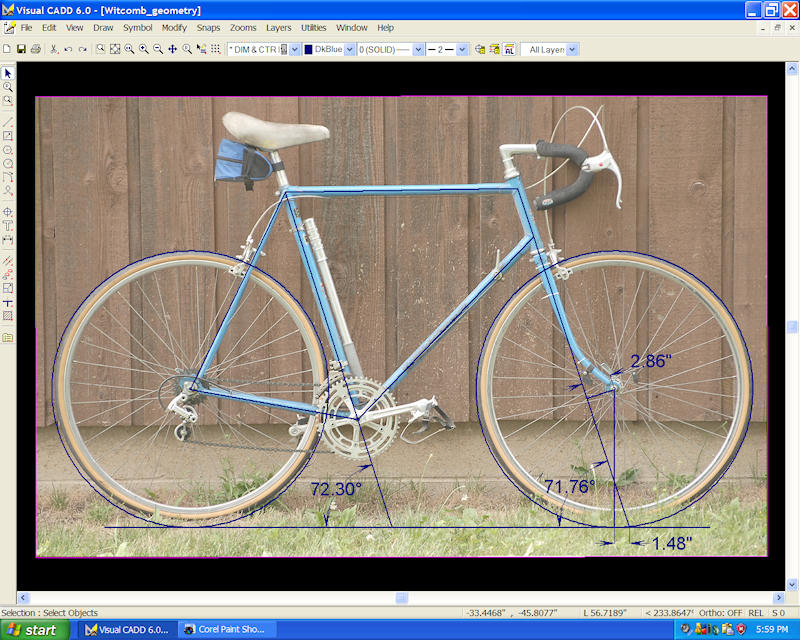
High tech requires that you own or have access to a CAD program that supports images. The process is pretty much like the paper method. Put the image on a drawing layer, then place lines over each frame tube. Use the bottom bracket for intersection rather than following the tubes exactly. Draw a line tangent to both wheels as the reference line for angles. You may also want to process the image so it's less obtrusive in the drawing. Here's a screen shot using Tri-Tools Visual CADD, though other programs will be similar in appearance.

Whether you're using paper or CAD, the rake and trail are now very easy to establish. With CAD different frames can be quickly compared just by overlaying the drawings.
C. Hoffman
last edit July 18, 2010